
All guides
Balance & Payments
Your account balance is pre-loaded credit that covers your placement orders. This guide explains how to top up, read your transaction history, and understand invoiced accounts.
Your Balance
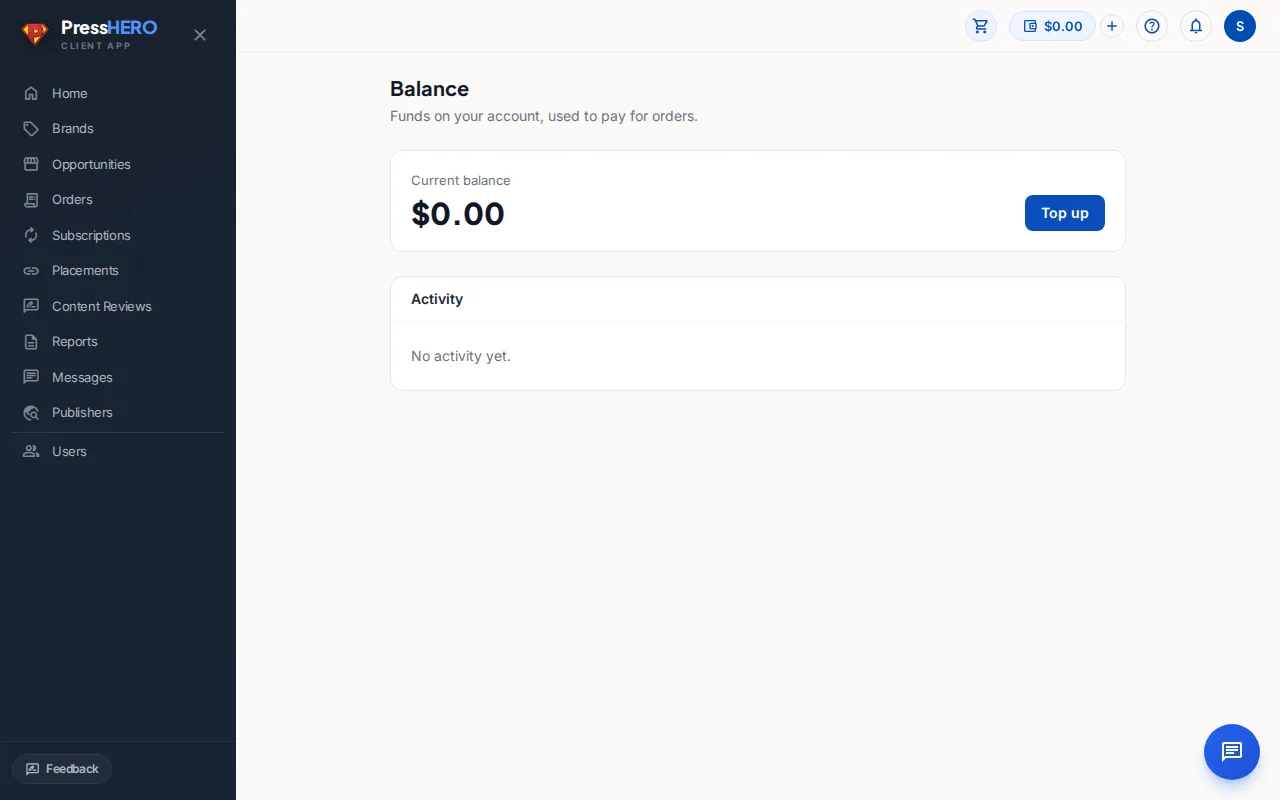
Your balance is pre-loaded credit held on your account, shown on the Balance tab of your Billing page. Every time you check out, the order total is deducted from this balance. You can see your current balance in two places:
- Balance chip — the blue pill in the top-right header shows your balance on every page. Click it to go directly to the Balance tab of your Billing page.
- Billing page — open the Balance tab to see the large figure showing your current available credit, with the full Activity table below it.
Your balance is shown in USD. If it reaches zero, checkout will prompt you to top up before confirming your next order.
Topping Up
Click the Top up button on the Balance tab of your Billing page — or the small + button next to the balance chip in the header — to open the Add Funds dialog.
Choose a preset amount ($500, $1,000, or $2,500) or enter a custom dollar amount (minimum $5). Then click Continue to payment. You'll be redirected to a secure Stripe-hosted checkout page to enter your card details.
Your balance is credited as soon as payment is confirmed by Stripe — this typically takes a few seconds. A Top-Up entry will appear in your Activity table once the funds land.
Your Activity Ledger
The Activity table on the Balance tab of your Billing page shows every credit and debit on your account in reverse-chronological order. Each row includes:
- Date — when the transaction was recorded.
- Type — one of Top-Up (funds added), Order Payment (checkout debit), Adjustment (team-applied correction), or Refund.
- Details — a note or a link to the related order.
- Amount — credits appear in green; debits appear as negative values in grey.
If you have more than one page of activity, pagination controls appear at the bottom of the table.
Invoiced Accounts
Some accounts are set up on an invoiced billing arrangement rather than prepaid balance. If your account is invoiced:
- The balance chip and the Top Up button will not appear — you don't need them, because orders aren't deducted from a balance.
- Your invoices appear on the Invoices tab of your Billing page, and we may also email them to you — see the next section for how to review and pay them online.
If you're unsure which arrangement applies to your account, reach out via Messages and your account manager will clarify.
Invoices and Paying Online
If your account is invoiced, everything about what you owe lives on your Billing page — find it in the left-hand navigation. The Billing page brings together your Invoices, Unbilled work, and Subscriptions in one place.
- Outstanding — invoices that have been issued and are awaiting payment. An overdue invoice, past its due date, is highlighted so it's easy to spot.
- History — invoices you've already paid, with the date they were paid.
To pay an outstanding invoice, click Pay next to it. You'll be redirected to a secure Stripe-hosted checkout page to enter your card details, just like topping up your balance. Once Stripe confirms the payment, you're returned to your Billing page, which shows "Confirming your payment…" for a few seconds and then "Payment received" once it's done.
The Unbilled work tab shows work that's already been delivered but hasn't been added to an invoice yet. An item shown as blocked means we're waiting on your decision about a price change before it can be billed — you'll see a note explaining what's needed.
If your account uses subscriptions, you'll now find them under the Subscriptions tab on the same Billing page.